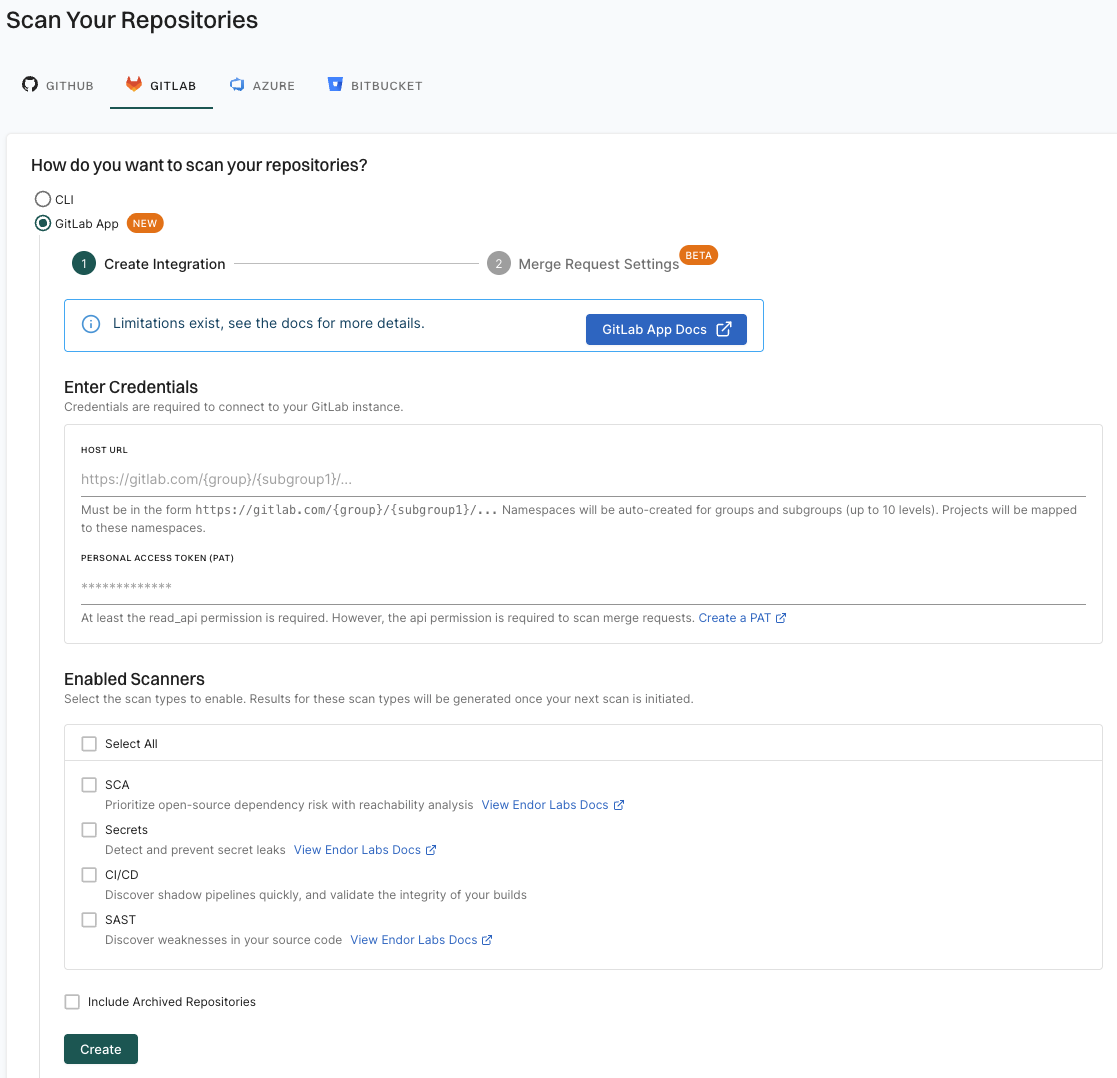
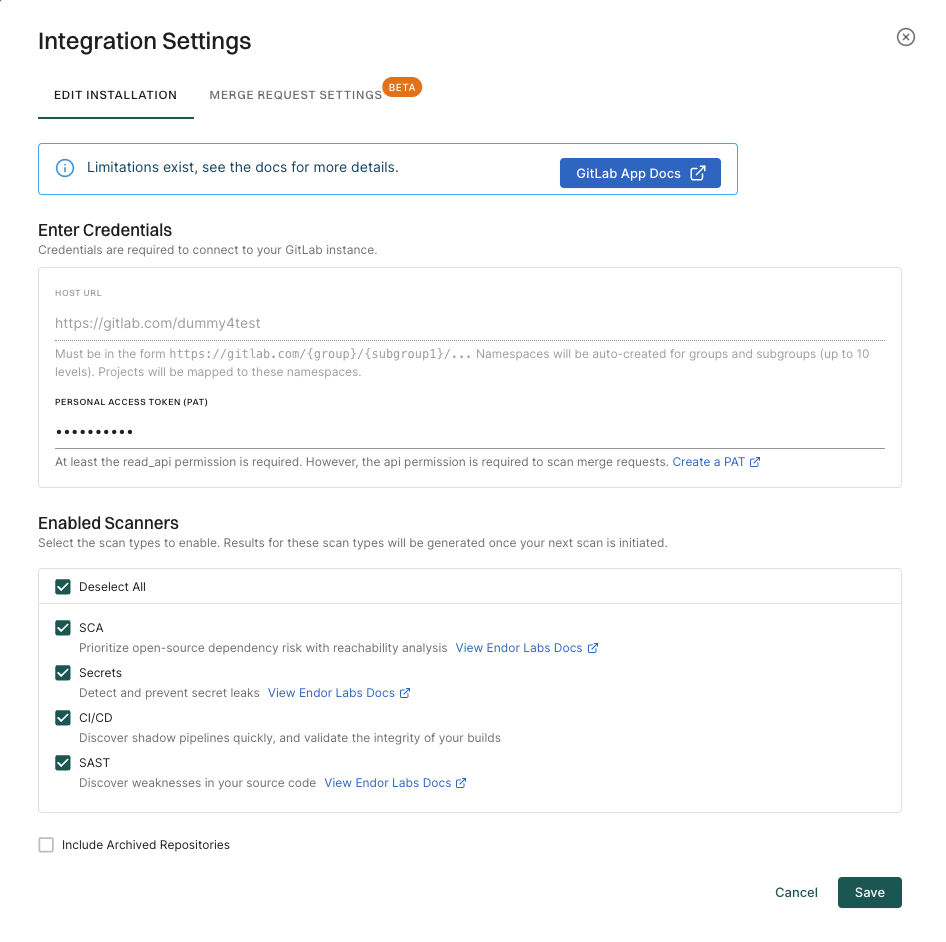
You can configure MR scans while creating a new GitLab App installation or for the existing GitLab App installations. Endor Labs uses group webhooks to scan your merge requests. For more information, refer to GitLab webhooks.
api scope. You need to configure webhooks to complete the MR scans configuration. Webhooks configuration through cURL requires the personal access token of the group owner with the api scope or the group owner role needs to configure the webhook on the GitLab UI.
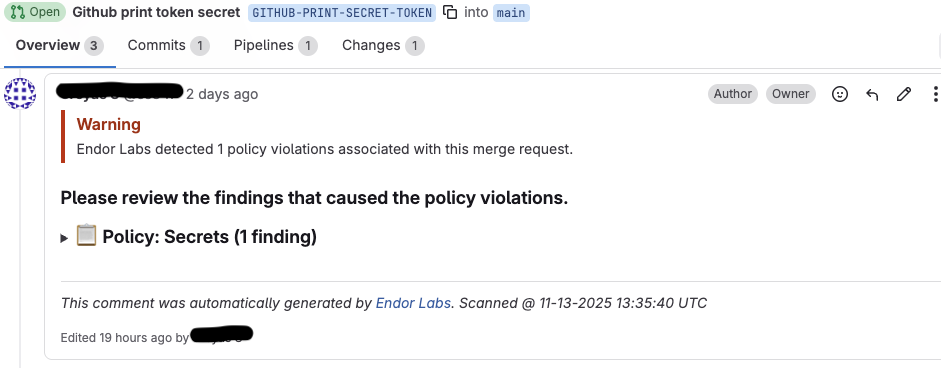
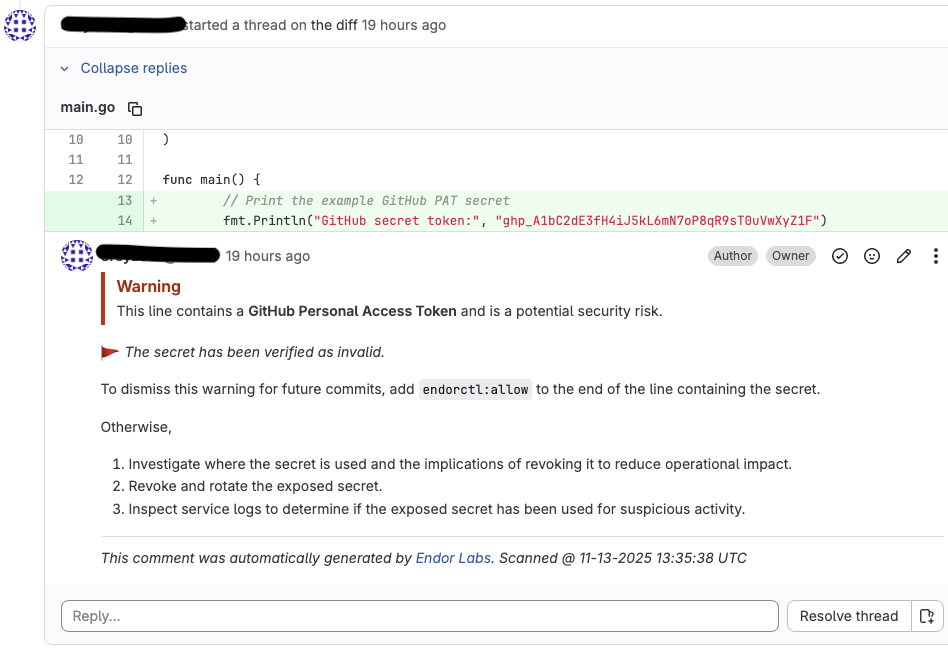
You can also choose to receive MR comments on your merge requests. After you configure MR comments, Endor Labs posts a comment on the merge request if any issues are detected during the MR scan. See GitLab MR comments for more information.
Configure MR scans during a GitLab App installation
After you complete the initial installation of the GitLab App to install the GitLab App in Endor Labs, you can configure MR scans. At this point, the GitLab App will be operational.
You can also choose to configure the webhook for MR scans and apply it to specific projects through a scan profile. See Scan profiles for more information. Thereby, you can ensure that MR scans are only for selected projects rather than all the projects in the group.
-
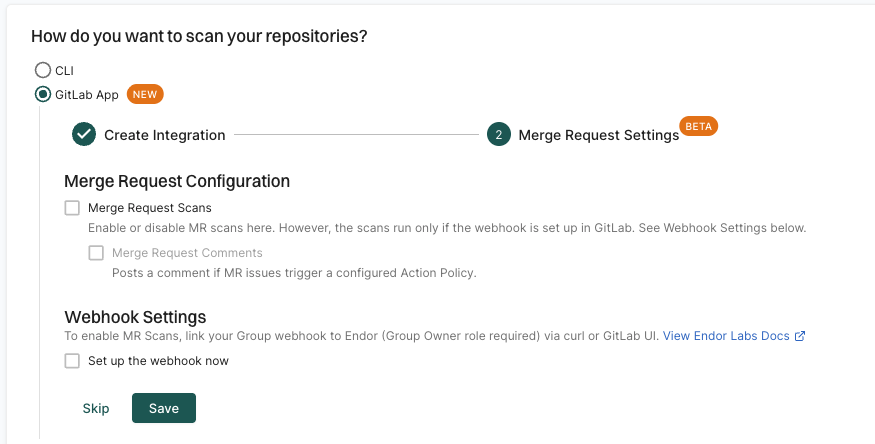
Select Merge Request Scans under Merge Request Configuration.

-
Optionally, select Merge Request Comments to enable MR comments.
When you enable MR comments, Endor Labs will post a comment on the merge request if any issues are detected during the MR scan. You need to set up MR comments in Endor Labs to receive the comments. See GitLab MR comments for more information.
If you select the options to configure MR scans in your GitLab App installation, merge requests for all the projects in the groups and subgroups are scanned. Instead, you can choose to configure MR scans and MR comments for selected projects. Choose not to select Merge Request Scans but continue to set up the webhook for MR scans. Set up a scan profile to configure MR scans. Ensure that you select Pull Request Scans and optionally select under Developer Workflow when you create the scan profile.
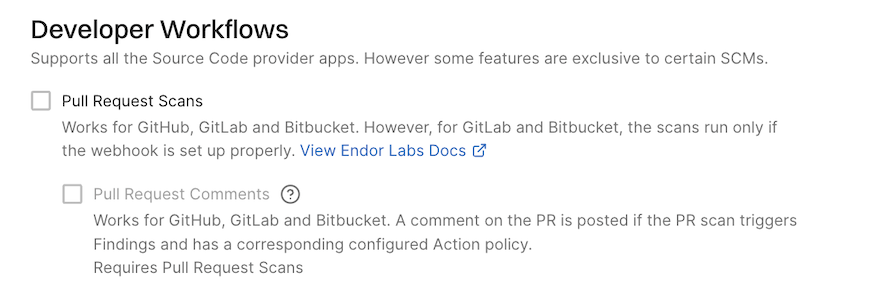
See Scan profiles for more information.
-
Select Set up the webhook now under Webhook Settings.
-
You can either configure the webhook on the GitLab UI or use the cURL command to set up the webhook.
Configure the webhook on the GitLab UI
Ensure that you have the group owner role to configure the webhook on GitLab.
-
Sign in to GitLab and select the group for which you want to configure the webhook.
-
Select Settings > Webhooks from the left sidebar.
-
Click Add Webhook.
-
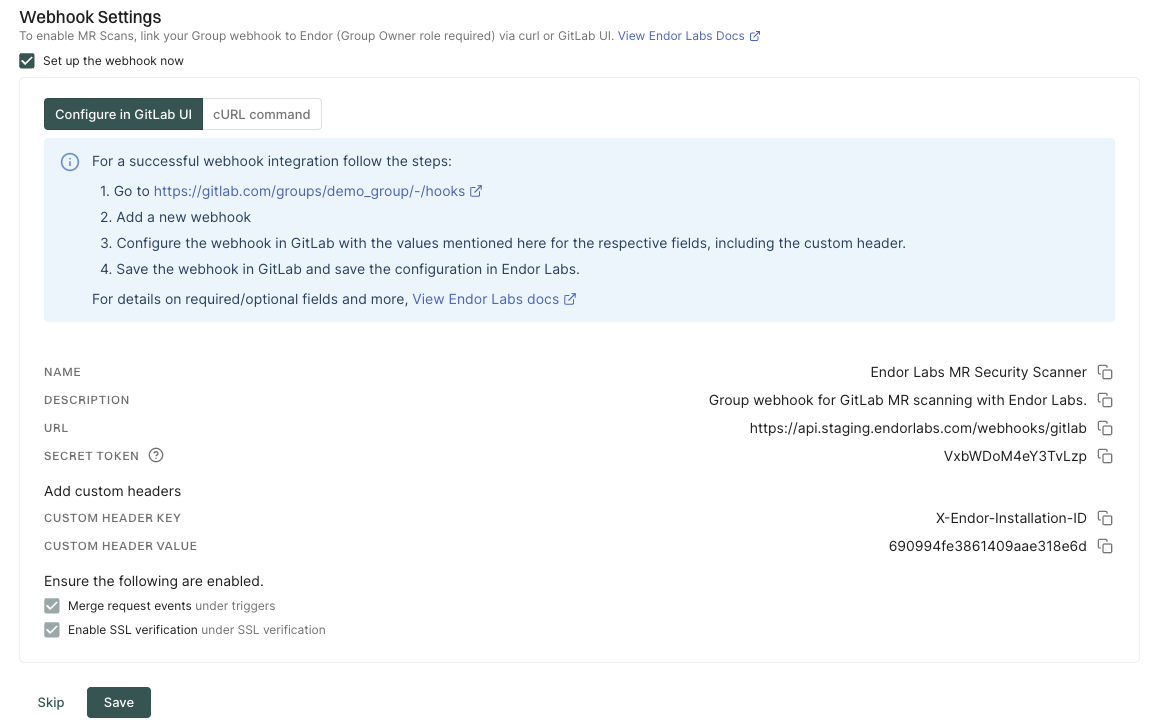
Configure the webhook in GitLab.
- Name: Name for the webhook.
- Description: Description for the webhook.
- URL: Enter
https://api.endorlabs.com/webhooks/gitlabas the URL to access the Endor Labs webhook API. - Secret Token: The secret token from Endor Labs.
You can copy the values from the Endor Labs user interface.
-
Click Add Custom Header and enter the following values:
- Key:
X-Endor-Installation-ID - Value: The Custom Header Value from the Endor Labs user interface. It is the installation ID of the Endor Labs GitLab installation.
- Key:
-
Select Merge request events under the Trigger section.
-
Ensure that Enable SSL verification is selected under the SSL verification section.
-
Click Add Webhook to save the changes.
You can create a webhook without SSL verification, but it is not recommended. Without SSL verification, the webhook is vulnerable to man-in-the-middle attacks.
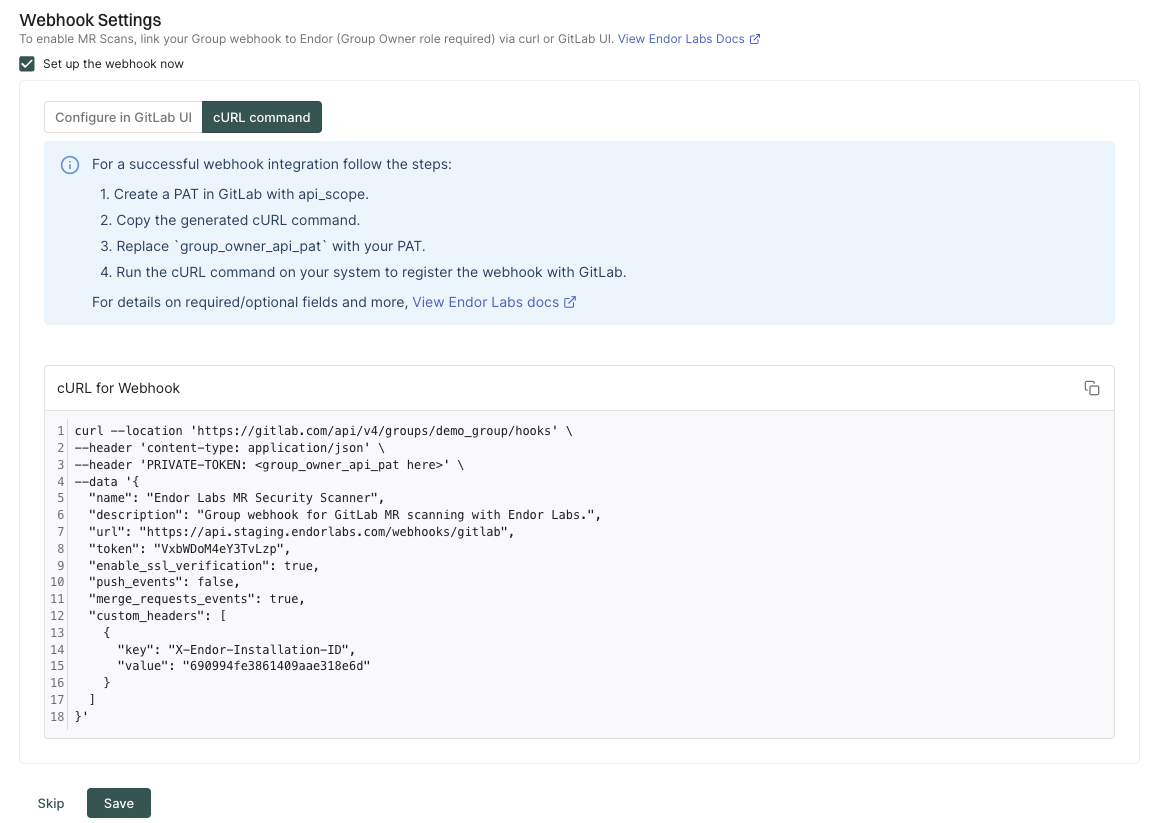
Configure the webhook using the cURL command
Ensure that you have the personal access token of the group owner with the
apiscope to configure the cURL command.-
Select cURL command to configure the webhook using the cURL command.
-
Replace
PRIVATE-TOKENwith the personal access token of the group owner with theapiscope. -
Copy the cURL command and run it on your system to register the webhook with GitLab.
-
- Click Save to save MR scan configuration.
Configure MR scans for existing GitLab installations
You can configure MR scans for existing GitLab installations or after the creation of a new GitLab installation.
api scope for MR scans.
-
Sign in to Endor Labs and select Integrations from the left sidebar.
-
Click Manage in GitLab under Source Control Managers.
-
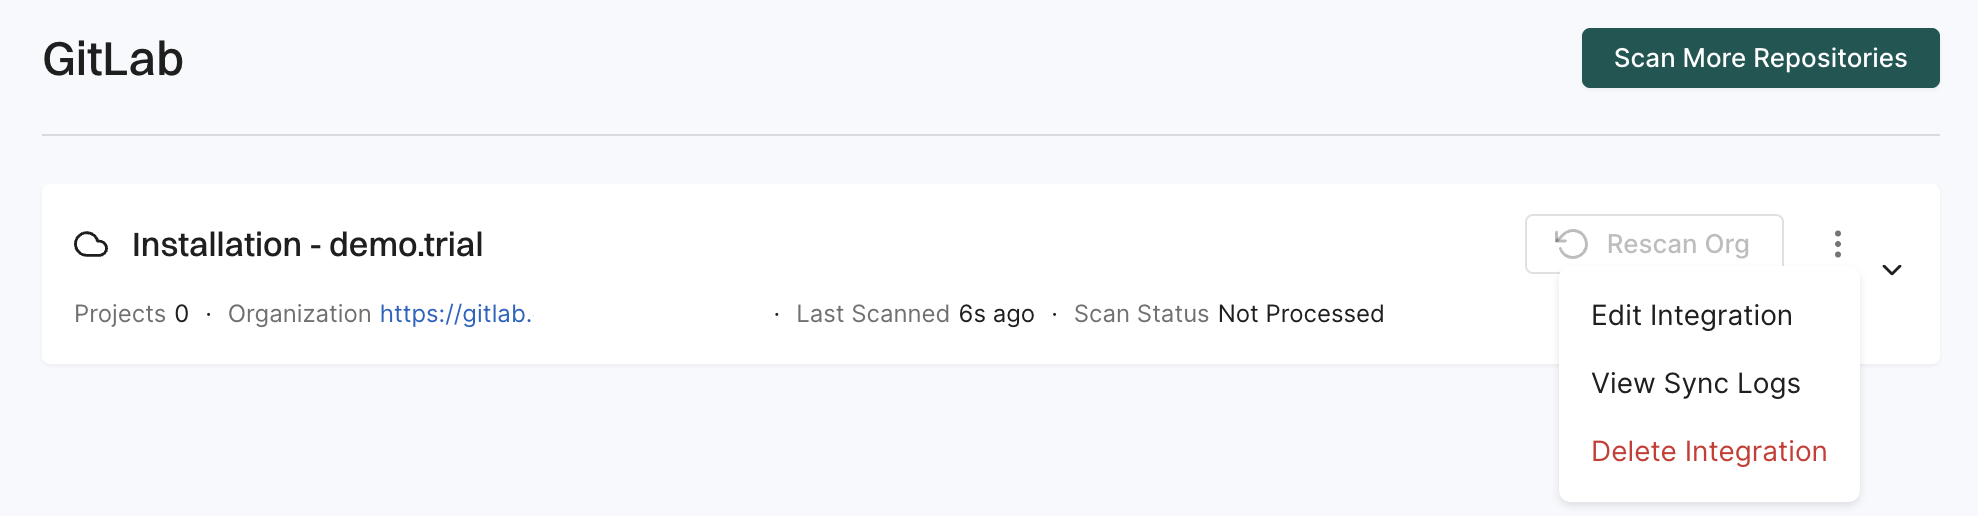
Click the vertical three dots next to the GitLab installation that you want to update.
-
Select Edit Integration.
-
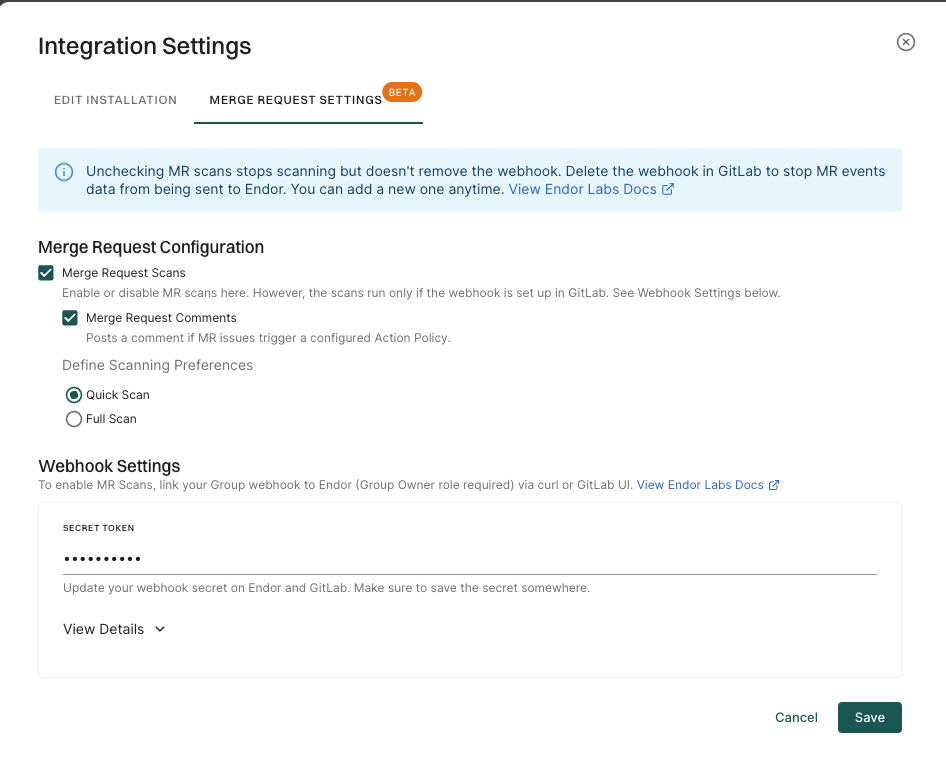
Select Merge Request Settings in Integration Settings.
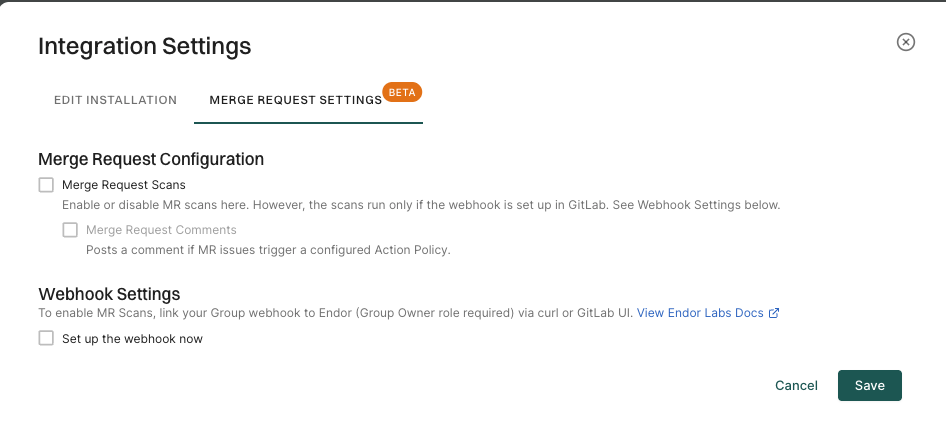
-
Select Merge Request Scans.
-
Optionally, select Merge Request Comments to enable MR comments.
Ensure that you complete the MR comments configuration in Endor Labs to receive the comments. See GitLab MR comments for more information.
-
Select Merge Request Scans to enable MR scans.
-
Select Set up the webhook now under Webhook Settings.
-
You can either configure the webhook on the GitLab UI or use the cURL command to set up the webhook.
Configure the webhook on the GitLab UI
Ensure that you have the group owner role to configure the webhook on GitLab.
-
Sign in to GitLab and select the group for which you want to configure the webhook.
-
Select Settings > Webhooks from the left sidebar.
-
Click Add Webhook.
-
Configure the webhook in GitLab.
- Name: Name for the webhook.
- Description: Description for the webhook.
- URL: Enter
https://api.endorlabs.com/webhooks/gitlabas the URL to access the Endor Labs webhook API. - Secret Token: The secret token from Endor Labs.
You can copy the values from the Endor Labs user interface.
-
Click Add Custom Header and enter the following values:
- Key:
X-Endor-Installation-ID - Value: The Custom Header Value from the Endor Labs user interface. It is the installation ID of the Endor Labs GitLab installation.
- Key:
-
Select Merge request events under the Trigger section.
-
Ensure that Enable SSL verification is selected under the SSL verification section.
-
Click Add Webhook to save the changes.
You can create a webhook without SSL verification, but it is not recommended. Without SSL verification, the webhook is vulnerable to man-in-the-middle attacks.
Ensure that you have the personal access token of the group owner with the Select cURL command to configure the webhook using the cURL command. Replace Copy the cURL command and run it on your system to register the webhook with GitLab.
Configure the webhook using the cURL command
api scope to configure the cURL command.
PRIVATE-TOKEN with the personal access token of the group owner with the api scope.
Configure webhook for GitLab App MR scans
GitLab MR scans require a webhook to be configured on GitLab. You can configure the webhook on the GitLab UI or use the cURL command to configure the webhook. For more information, refer to GitLab webhooks.
Configure the webhook on the GitLab UI
Ensure that you have the group owner role to configure the webhook on GitLab.
-
Sign in to GitLab and select the group for which you want to configure the webhook.
-
Select Settings > Webhooks from the left sidebar.
-
Click Add Webhook.
-
Configure the webhook in GitLab.
- Name: Name for the webhook.
- Description: Description for the webhook.
- URL: Enter
https://api.endorlabs.com/webhooks/gitlabas the URL to access the Endor Labs webhook API. - Secret Token: The secret token from Endor Labs.
You can copy the values from the Endor Labs user interface.
-
Click Add Custom Header and enter the following values:
- Key:
X-Endor-Installation-ID - Value: The Custom Header Value from the Endor Labs user interface. It is the installation ID of the Endor Labs GitLab installation.
- Key:
-
Select Merge request events under the Trigger section.
-
Ensure that Enable SSL verification is selected under the SSL verification section.
-
Click Add Webhook to save the changes.
You can create a webhook without SSL verification, but it is not recommended. Without SSL verification, the webhook is vulnerable to man-in-the-middle attacks.
Configure the webhook using the cURL command
Ensure that you have the personal access token of the group owner with the api scope to configure the cURL command.
-
Select cURL command to configure the webhook using the cURL command.
-
Replace
PRIVATE-TOKENwith the personal access token of the group owner with theapiscope. -
Copy the cURL command and run it on your system to register the webhook with GitLab.
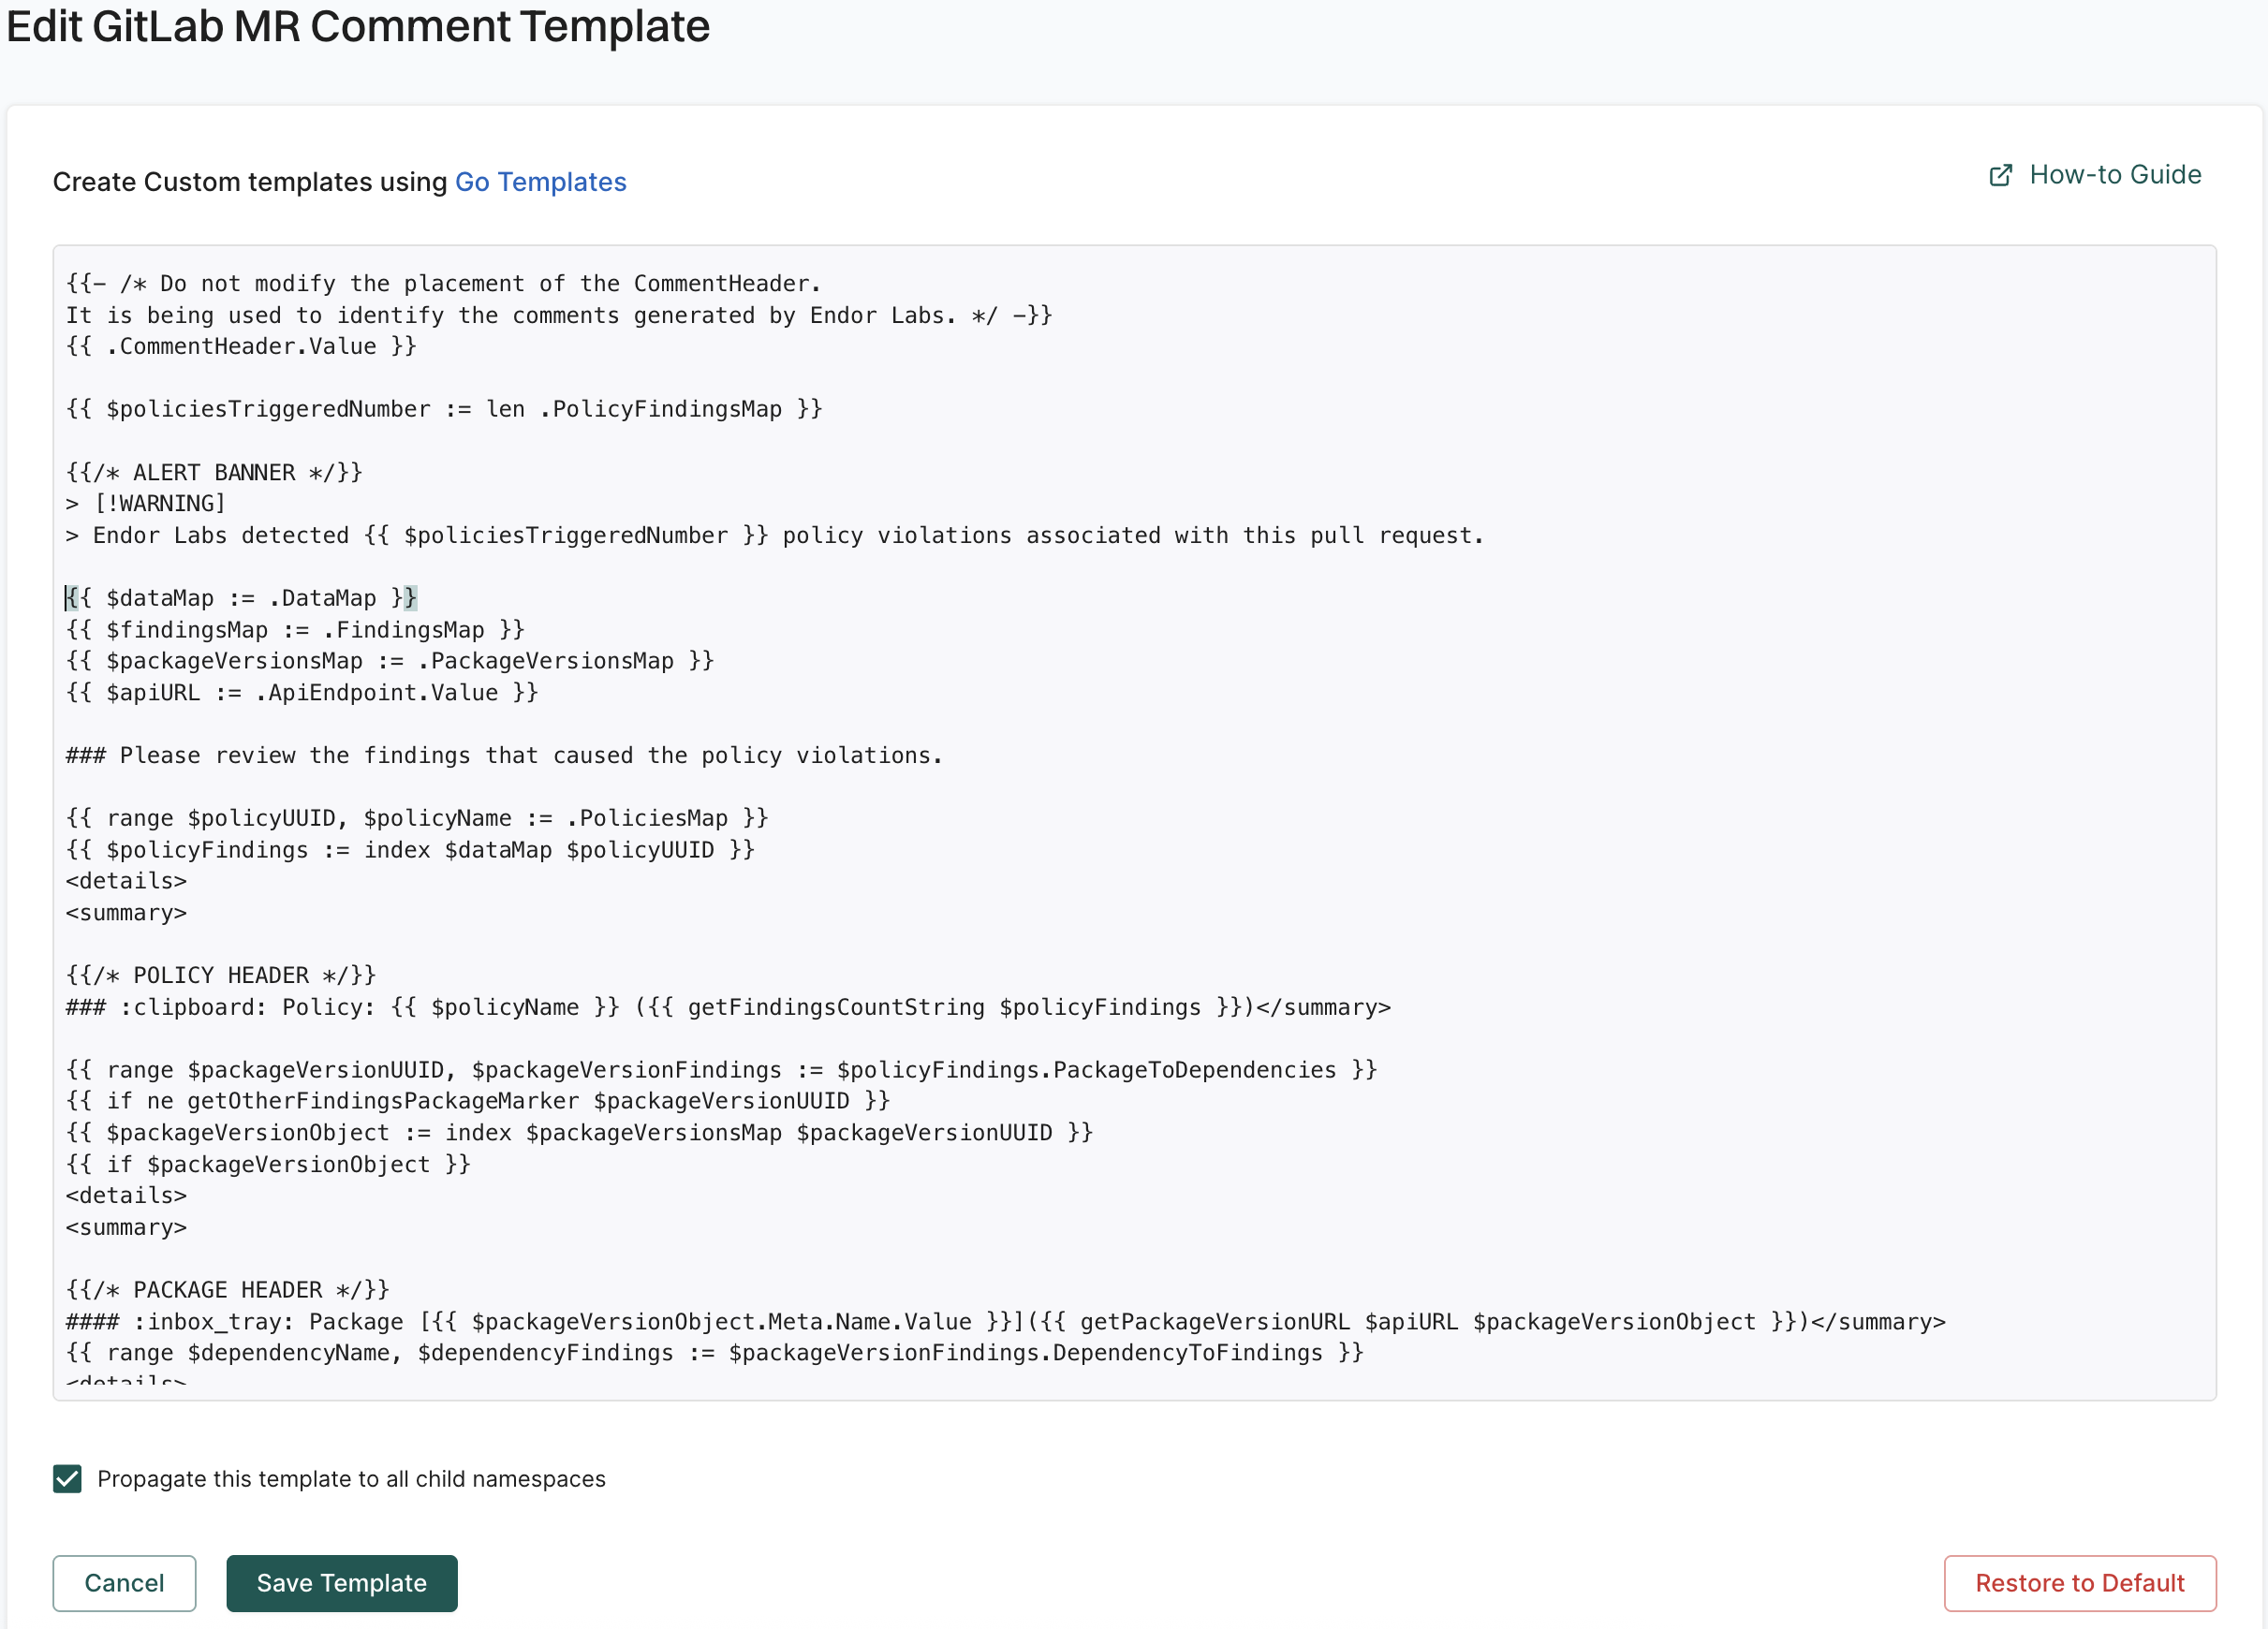
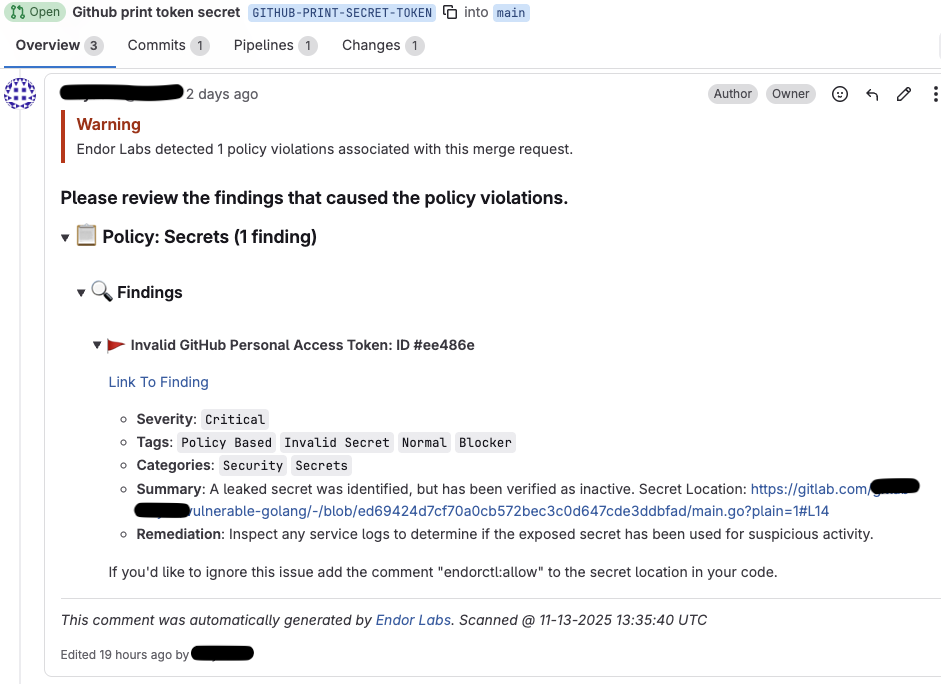

The action policy that you create triggers the posting of comments on your merge request after a scan is complete. See Action policy for more information. You can create multiple action policies based on your requirements, which the MR scan can trigger. If you create action policy with the
Secrettemplate, you get an inline comment with the line number where the secret is detected.Ensure that you configure the following important settings in the action policy:
Choose an appropriate action policy template or create a custom action policy.
You can choose an action policy template like Containers or create a custom action policy.
Under Action, select Enforce Policy, then choose:
Define the scope of the policy using tags. Only projects that match the specified tags will receive MR comments.
Select Propagate this policy to all child namespaces if you want to apply the policy to all child namespaces.